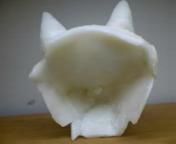
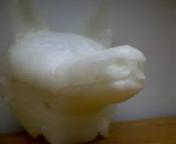
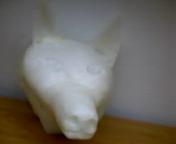
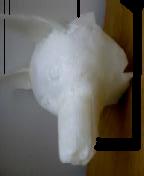
I worked up this dog face today. It is supossed to look like a Siberian Husky. I am thinking of casting this using ceramic slurry. Does anyone have a recipe that they have used that works? Also, I am looking for suggestions on gates and risers. The snout is the thickest part. My thoughts are to use a ceramic slurry that I would fire and then put in loose sand to cast. I am thinking that I would cast with the snout down and the sprue going into the bottom of the snout. Sorry the pictures aren't too great...My wife has the digital camera out of state.
The sprue goes into the bottom of the muzzle. Small risers off the ears and some larger risers around the back edge. Any comments or suggestions, click on my e-mail link below or post a message on casting hobby list.
Thanks!
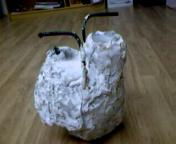
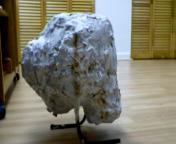
Well, I decided to do it in investment casting. I got some pottery plaster which I mixed per the directions and brushed on for a thin coat. Then, for the rest, I mixed the plaster with equal part of silica sand. (The volume of sand and dry plaster was the same). I put a good layer over the whole sculpture, then wrapped chicken wire around it and added more plaster. I also put in one piece of rebar bent to form a support for burning out the wax. Here is a picture below...the sprue is on the right. The second picture shows the investment turned up side down for burnout. The rebar seemed to work well.
I burned it out by puting it into a pyrex dish in the electric kiln. The wax seemed to melt out well but it made a lot of stinky smoke. I actually did a few low temperature heats because I never had time to do a full cycle. I have since found out that it is very bad to do this.
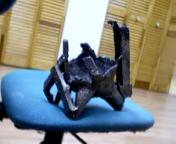
Here is a picture of the casting just hammered out of the investment with sprues and risers and defects still attached.
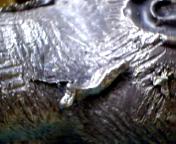
I almost had a short pour. As you can see, the sprue and risers didn't fill. I had a little problem with my pouring tongs...they are made out of bronze and they got too hot and went floppy on me. So I had to pour with my lifting tongs. So by the time I figured all that out, the metal in the crucible was starting to get hard. I am just glad I got as much as I did! By the way...this is silicon bronze.
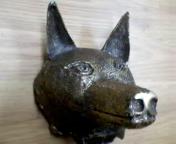
Here is what we have after I spent an hour knocking off the defects, sprues and risers. Sorry the quality of the pictures isn't great, I will have to update them when I get my digital camera back.
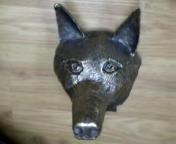
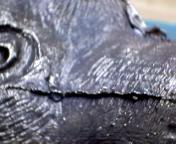
Here is a close up of some of the defects. Flashing is caused by cracks in the investment.
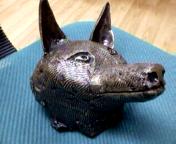
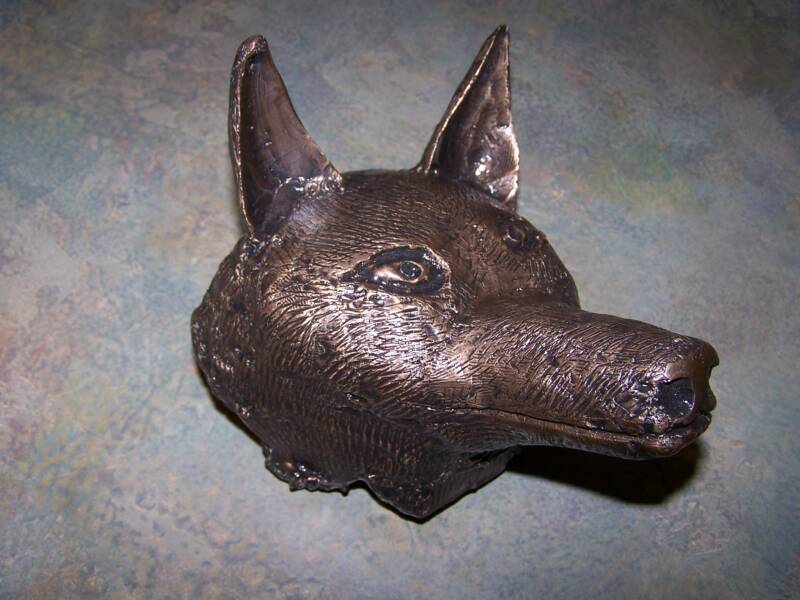
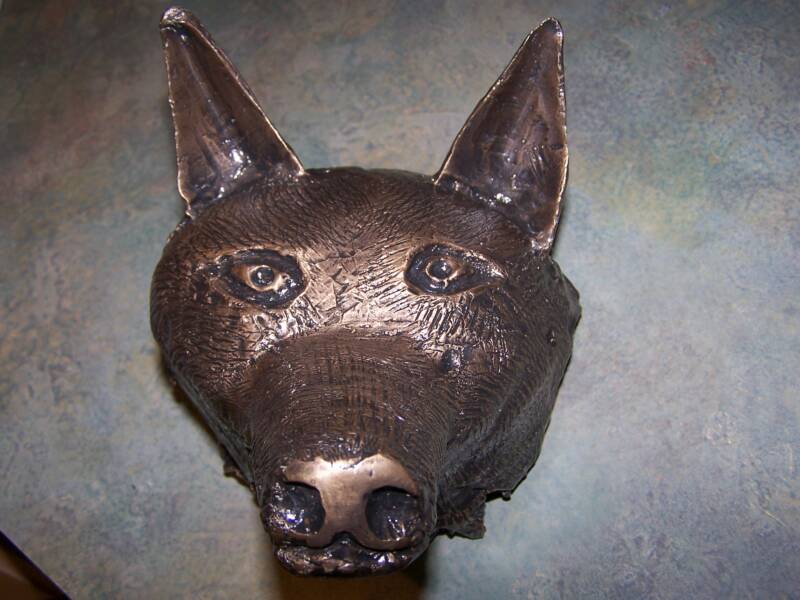
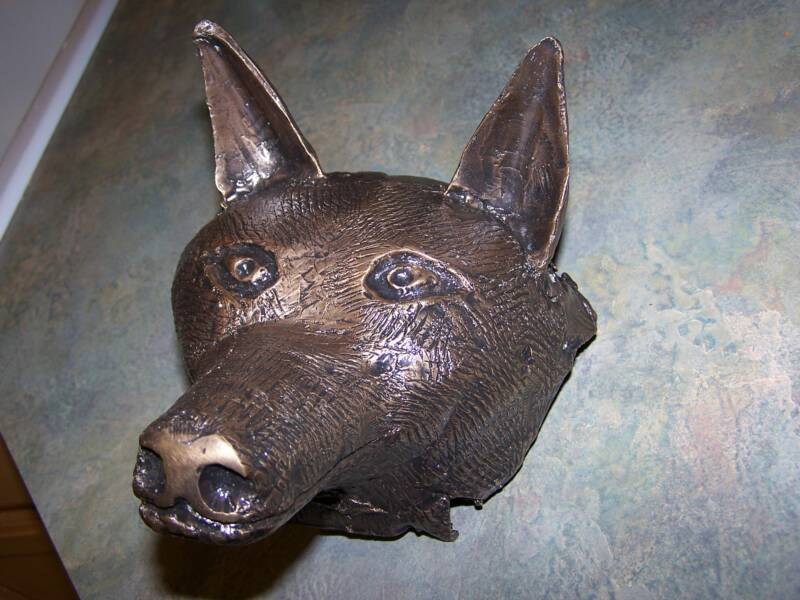
The surface turned out with a dark brown color which is nice, but I think I would like to go with a darker patina and then shine up the raised areas. Does anyone have suggestions for this?
The sprue and risers worked very well...I didn't notice any shrinks....By the way, I used foam for the sprue and risers...They were glued on with a glue gun. After everything was coated with investment, I heated a hack saw blade red hot and pushed it into the foam to melt it quickly.
(Or you can click on the bug!)
1 and a 2 and a 1, 2, 3, 4....
10-28-2005
I used something called liver of sulfer to make a dark patina. then I sanded the high spots and put wax on. I didn't like the wax because it was hard to get out of the small grooves...so I took the wax off and used a shellac. It looks much better that way! I will try to get a better picture soon.
11-21-2005
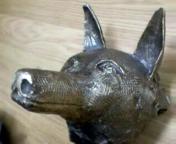
I finally got a picture with my digital camera. Actually a few pictures.